LED Cube/en: Unterschied zwischen den Versionen
Marvin (Diskussion | Beiträge) Keine Bearbeitungszusammenfassung |
Marvin (Diskussion | Beiträge) Keine Bearbeitungszusammenfassung |
||
| Zeile 30: | Zeile 30: | ||
printed on many 3D printers. | printed on many 3D printers. | ||
[[Category:Bausaetze]] | [[Category:Bausaetze]] | ||
Version vom 30. April 2012, 00:16 Uhr
| LED Cube Series | |
|---|---|
|
Chapter 1: Build Section 0: Preparation and Requirements Section 1: PCB Soldering Manual Section 2: Cube Soldering Manual Section 3: Assembly and Testing | |
|
Chapter 2: Play | |
|
Chapter 3: Learn |
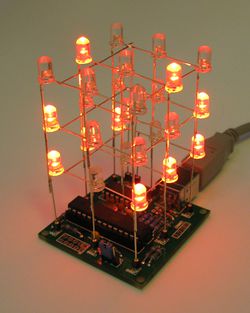
The LED Cube described on this page is a simple 3 * 3 * 3 single-color LED cube. It is one of our easiest workshops, employing only through-hole components and thus specifically suited for introductory courses on soldering.
Getting Started
If you are interested in how they are built, you can read the PCB Soldering Manual for the PCB or the Cube Soldering Manual to learn how to construct the cube structure itself.
If you are interested in a more detailed view on the used software, check out Building from Source, where building the source code is explained.
If you want to learn how your cube actually works, read Understanding the Electronics. Also, you can write your own program to make your cube even fancier.
Accessories
Hefee has created a very cool Case for the PCB, which can be printed on many 3D printers.


