LED Cube/Preparation and Requirements: Unterschied zwischen den Versionen
Marvin (Diskussion | Beiträge) |
Marvin (Diskussion | Beiträge) |
||
| Zeile 9: | Zeile 9: | ||
Second, it is very helpful to have a calm hand. For reference: Grab two pencils, one for each hand. Put both hands down on the table as if you were trying to write. Then try to tip one of the pencil heads with the other. Being able to do this on first or second try is about the level of calmness we recommend. Of course, it is possible to solder the cube even if you can not do that - but it will not be as easy as you may wish. | Second, it is very helpful to have a calm hand. For reference: Grab two pencils, one for each hand. Put both hands down on the table as if you were trying to write. Then try to tip one of the pencil heads with the other. Being able to do this on first or second try is about the level of calmness we recommend. Of course, it is possible to solder the cube even if you can not do that - but it will not be as easy as you may wish. | ||
Third, you have to be responsible. The tools we are using are potentially dangerous. The soldering iron will be heated up to 300 to 330 degrees Celsius which can cause serious injury. | Third, you have to be responsible. The tools we are using are potentially dangerous. The soldering iron will be heated up to 300 to 330 degrees Celsius which can cause serious injury to you and everyone around you. | ||
==Required Tools== | ==Required Tools== | ||
Version vom 29. April 2012, 22:39 Uhr
| LED Cube Series | |
|---|---|
|
Chapter 1: Build Section 0: Preparation and Requirements Section 1: PCB Soldering Manual Section 2: Cube Soldering Manual Section 3: Assembly and Testing | |
|
Chapter 2: Play | |
|
Chapter 3: Learn |
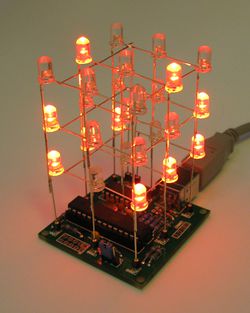
Welcome to the preparatory step of the LED Cube series. Before starting, there are two things we have to make sure: First you have to understand what tools you will be needing. Second, we will assist you with unboxing the LED Cube kit.
Required Skills
As this is our introductory workshop to soldering, the required skill set you need is not big. Though soldering is easy in general, it can become quite stressful if you do not have some basic features:
First, of course, you should be able to read and understand this manual. If you are not familiar with the English language and have to guess the meaning of some sentences, have a look at our front page to see if the manual is available in a language you are more comfortable with. If you are currently taking part in an cccgoe workshop, this is of course not important, but you should ask a tutor if you are unsure how to do something.
Second, it is very helpful to have a calm hand. For reference: Grab two pencils, one for each hand. Put both hands down on the table as if you were trying to write. Then try to tip one of the pencil heads with the other. Being able to do this on first or second try is about the level of calmness we recommend. Of course, it is possible to solder the cube even if you can not do that - but it will not be as easy as you may wish.
Third, you have to be responsible. The tools we are using are potentially dangerous. The soldering iron will be heated up to 300 to 330 degrees Celsius which can cause serious injury to you and everyone around you.
Required Tools
|
We will supply all tools to you on cccgoe workshops. You do not need to (and should not) bring things like soldering stations. In most cases, you do however need a viewing device for this wiki. |
Unboxing the Kit
If you are taking part in a cccgoe workshop or bought one, you now should have an LED Cube kit in front of you. You should check if your kit available before you are starting the workshop. This is the list of parts coming with the kit:
| Amount | Component Name | Picture |
|---|
