LED Cube/Preparation and Requirements: Unterschied zwischen den Versionen
Marvin (Diskussion | Beiträge) |
Marvin (Diskussion | Beiträge) Keine Bearbeitungszusammenfassung |
||
| (43 dazwischenliegende Versionen desselben Benutzers werden nicht angezeigt) | |||
| Zeile 1: | Zeile 1: | ||
{{LED Cube Series/en}} | {{LED Cube Series/en}} | ||
Welcome to the preparatory | Welcome to the preparatory section of the [[LED Cube/en|LED Cube]] series. Before starting, there are two things we have to make sure: First you have to understand what tools you will be needing. Second, we will assist you with unboxing the LED Cube kit. | ||
==Required Skills== | ==Required Skills== | ||
As this is our introductory workshop to soldering, the required skill set | As this is our introductory workshop to soldering, the required skill set is not big. Though soldering is easy in general, it can become quite stressful if you do not have some basic features: | ||
First, of course, you should be able to read and understand this manual. If you are not familiar with the English language and have to guess the meaning of some sentences, have a look at our [[LED Cube|front page]] to see if the manual is available in a language you are more comfortable with. If you are currently taking part in an cccgoe workshop, this is of course not important, but you should ask a tutor if you are unsure how to do something. | First, of course, you should be able to read and understand this manual. If you are not familiar with the English language and have to guess the meaning of some sentences, have a look at our [[LED Cube|front page]] to see if the manual is available in a language you are more comfortable with. If you are currently taking part in an cccgoe workshop, this is of course not important, but you should ask a tutor if you are unsure how to do something. | ||
| Zeile 9: | Zeile 9: | ||
Second, it is very helpful to have a calm hand. For reference: Grab two pencils, one for each hand. Put both hands down on the table as if you were trying to write. Then try to tip one of the pencil heads with the other. Being able to do this on first or second try is about the level of calmness we recommend. Of course, it is possible to solder the cube even if you can not do that - but it will not be as easy as you may wish. | Second, it is very helpful to have a calm hand. For reference: Grab two pencils, one for each hand. Put both hands down on the table as if you were trying to write. Then try to tip one of the pencil heads with the other. Being able to do this on first or second try is about the level of calmness we recommend. Of course, it is possible to solder the cube even if you can not do that - but it will not be as easy as you may wish. | ||
Third, you have to be responsible. The tools we are using are potentially dangerous. The soldering iron will be heated up to 300 to 330 degrees Celsius which can cause serious injury to you and everyone around you. | Third, you have to be responsible. The tools we are using are potentially dangerous. The soldering iron will be heated up to 300 to 330 degrees Celsius which can cause serious injury to you and everyone around you. The solder contains lead which is a heavy metal and poisonous to you, though you should not eat while soldering and wash your hands directly afterwards. Solder also contains flux which will vaporize when heated. Those vapors are generally not very healthy and you should only solder in well-ventilated areas. | ||
==Required Tools== | ==Required Tools== | ||
{{ | {{SmallAttention|At '''cccgoe workshops''', ''we'' will supply all tools to you . You do not need to (and should not) bring things like soldering stations. Experience shows that foreign soldering equipment often does not hold what the owners think about it. In the case that you require to be trained on your own tools, you may bring them and we will try to show you how to work with them, but we do not promise anything. Anyway, in most cases you do need a viewing device for this wiki.}} | ||
The required tools to build an LED Cube are: | |||
* A soldering device. It should contain some sort of regulation and allow you to set the temperature to about 300 to 330 degrees Celsius. It would be good if the tip wouldn't exceed a width of 2.5 mm. | |||
* some solder | |||
* side cutters | |||
* (needle-nose) pliers | |||
* a USB A -> B cable | |||
* externally powered USB hub (to protect your computer) | |||
* a bending gauge for the LEDs (you can build this by yourself by cutting nine 5 mm holes into a piece of wood.) | |||
===Handy Tools=== | |||
The tools in this section are not required, but they may come in handy: | |||
* A bending gauge for the resistors and diodes | |||
* magnifier glasses | |||
* crocodile clamps | |||
* laboratory power supply | |||
* sand paper | |||
* tweezers | |||
==Unboxing the Kit== | ==Unboxing the Kit== | ||
If you are taking part in a cccgoe workshop or bought one, you now should have an LED Cube kit in front of you. You should check if your kit | If you are taking part in a cccgoe workshop or bought one, you now should have an LED Cube kit in front of you. You should check if your kit is complete before starting the workshop. This is the list of parts coming with the kit: | ||
{|class="wikitable" | {|class="wikitable" | ||
! Amount !! Component Name !! Picture | ! Amount !! Component Name !! Picture | ||
|- | |- | ||
| 1 || 1500 Ohm resistor || [[file:r- | | 1 || LED Cube PCB | ||
| [[Datei:Lcpcb-base.jpg|frameless|border]] | |||
|- | |||
| 1 || 1500 Ohm resistor | |||
| [[file:r-1500.jpeg|frameless|border]] | |||
|- | |||
| 2 || 68 Ohm resistor | |||
| [[file:r-68.jpeg|frameless|border]] | |||
|- | |||
| 1 || 10000 Ohm resistor | |||
| [[file:r-10000.jpeg|frameless|border]] | |||
|- | |||
| 2 || 3.6 V Zener dioes | |||
| [[file:lcpcb-01-00.jpg|frameless|border]] | |||
|- | |||
| 2 || 100 nF capacitors | |||
| [[file:lcpcb-05-01.jpg|frameless|border]] | |||
|- | |||
| 2 || 22 pF capacitors | |||
| [[file:lcpcb-05-00.jpg|frameless|border]] | |||
|- | |||
| 1 || 16.000 MHz crystal | |||
| [[file:lcpcb-06-00.jpg|frameless|border]] | |||
|- | |||
| ≥12 || round socket pins | |||
| | |||
|- | |||
| 1 || 28-pin socket | |||
| [[file:lcpcb-08-00.jpg|frameless|border]] | |||
|- | |||
| 1 || Transistor-Array ULN2003 | |||
| [[file:lcpcb-07-00.jpg|frameless|border]] | |||
|- | |||
| 1 || pre-programmed microcontroller ATmega8 | |||
| [[file:cs-070.jpg|frameless|border]] | |||
|- | |||
| ≥27 || LEDs (color selected by you) | |||
| [[file:Cs3-001.jpeg|frameless|border]] | |||
|- | |||
| ≥9 || resistors of a value depending on the LED color | |||
| | |||
|- | |||
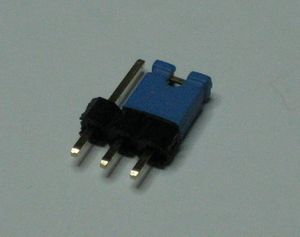
| 1 || 3-pin header | |||
|rowspan="2" | [[File:lcpcb-10-00.jpg|frameless|border]] | |||
|- | |||
| 1 || jumper | |||
|- | |||
| || Some silver enameled wire | |||
|[[file:Cs-060.jpg|frameless|border]] | |||
|} | |} | ||
{{continue|If you have checked the contents of your kit you should start with [[LED Cube/PCB Soldering Manual|Section 1: PCB Soldering Manual]].}} | |||
Aktuelle Version vom 30. April 2012, 18:18 Uhr
| LED Cube Series | |
|---|---|
|
Chapter 1: Build Section 0: Preparation and Requirements Section 1: PCB Soldering Manual Section 2: Cube Soldering Manual Section 3: Assembly and Testing | |
|
Chapter 2: Play | |
|
Chapter 3: Learn |
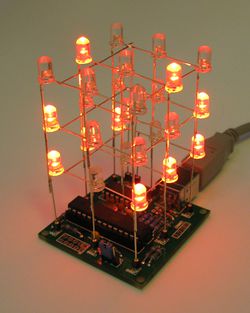
Welcome to the preparatory section of the LED Cube series. Before starting, there are two things we have to make sure: First you have to understand what tools you will be needing. Second, we will assist you with unboxing the LED Cube kit.
Required Skills[Bearbeiten]
As this is our introductory workshop to soldering, the required skill set is not big. Though soldering is easy in general, it can become quite stressful if you do not have some basic features:
First, of course, you should be able to read and understand this manual. If you are not familiar with the English language and have to guess the meaning of some sentences, have a look at our front page to see if the manual is available in a language you are more comfortable with. If you are currently taking part in an cccgoe workshop, this is of course not important, but you should ask a tutor if you are unsure how to do something.
Second, it is very helpful to have a calm hand. For reference: Grab two pencils, one for each hand. Put both hands down on the table as if you were trying to write. Then try to tip one of the pencil heads with the other. Being able to do this on first or second try is about the level of calmness we recommend. Of course, it is possible to solder the cube even if you can not do that - but it will not be as easy as you may wish.
Third, you have to be responsible. The tools we are using are potentially dangerous. The soldering iron will be heated up to 300 to 330 degrees Celsius which can cause serious injury to you and everyone around you. The solder contains lead which is a heavy metal and poisonous to you, though you should not eat while soldering and wash your hands directly afterwards. Solder also contains flux which will vaporize when heated. Those vapors are generally not very healthy and you should only solder in well-ventilated areas.
Required Tools[Bearbeiten]
The required tools to build an LED Cube are:
- A soldering device. It should contain some sort of regulation and allow you to set the temperature to about 300 to 330 degrees Celsius. It would be good if the tip wouldn't exceed a width of 2.5 mm.
- some solder
- side cutters
- (needle-nose) pliers
- a USB A -> B cable
- externally powered USB hub (to protect your computer)
- a bending gauge for the LEDs (you can build this by yourself by cutting nine 5 mm holes into a piece of wood.)
Handy Tools[Bearbeiten]
The tools in this section are not required, but they may come in handy:
- A bending gauge for the resistors and diodes
- magnifier glasses
- crocodile clamps
- laboratory power supply
- sand paper
- tweezers
Unboxing the Kit[Bearbeiten]
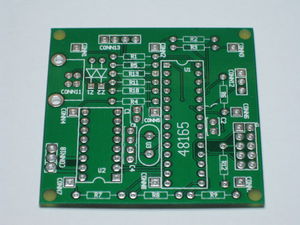
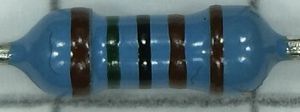
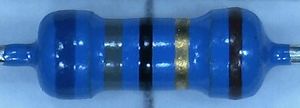
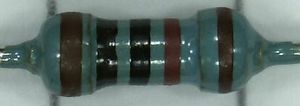
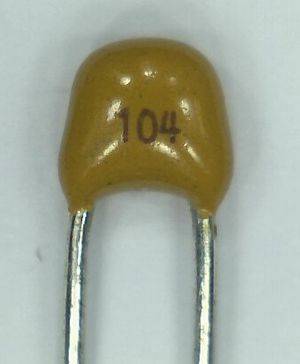
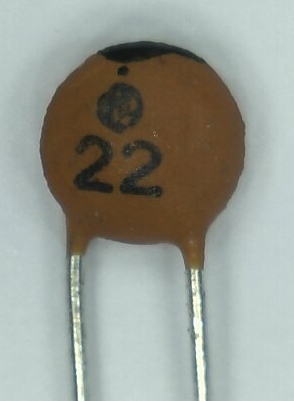
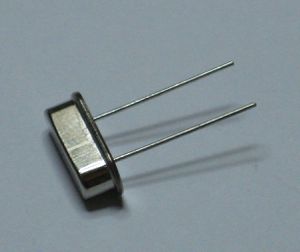
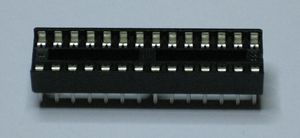
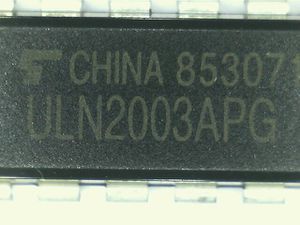
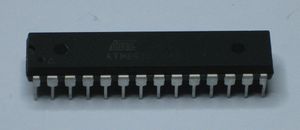
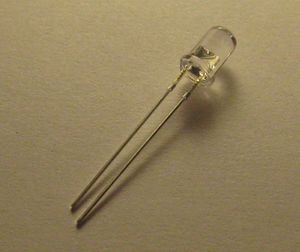
If you are taking part in a cccgoe workshop or bought one, you now should have an LED Cube kit in front of you. You should check if your kit is complete before starting the workshop. This is the list of parts coming with the kit:
|
If you have checked the contents of your kit you should start with Section 1: PCB Soldering Manual. |
