LED Cube/PCB Lötanleitung
under construction
Vorlage:LED Cube Series This page contains the soldering manual for the PCB of the LED Cube.
A full schematic of the PCB can be downloaded here: Datei:Cube.pdf.
USB Resistors

First we solder R10, R11 and R13. As all resistors we are using in this project, their orientation is not relevant. You can see the resistor values in the schematic or in the table below, together with the color code marking:
| Name | Value | Color Code |
|---|---|---|
| R10 | 68 Ohm |  (blue-green-black-gold-brown) (blue-green-black-gold-brown)
|
| R11 | 68 Ohm | (blue-green-black-gold-brown)
|
| R13 | 1500 Ohm |  (brown-green-black-brown-brown) (brown-green-black-brown-brown)
|
USB Zener Diodes

Additionally, we need two 3.6 V Zener diodes for the data lines, Z1 and Z2. Here, you have to pay attention to their orientation. The (black) line on the diode is the same as the single line on the symbol (as opposed to the triangle) that is printed onto the PCB. You can see that in the figure on the left.
Reset Resistor

The Reset pin gets a 10 kOhm resistor R12 to the 5 V line. Again, have a look in the table for the correct color markings. Orientation is irrelevant.
| Name | Value | Color Code |
|---|---|---|
| R12 | 10 kOhm |  (brown-black-black-red-brown) (brown-black-black-red-brown)
|
Column Resistors
If you bought a kit or attend a workshop, you probably already got the correct Resistors. There should be (at least) nine of the same value. Just solder them into the places for R1 to R9.
If you are supplying your own LEDs or did not get matching resistors for any other reason, you have to pay attention: The ideal column resistors should be chosen for each LED color separately. You are always on the safe side, if you choose a high value, but then your cube may not be as bright as you want it to be. If you are interested in this, read LED Cube/Column Resistors in Detail. Alternatively, here is a table of common colors, their forward voltages and the recommended resistor value:
| Color | Forward Voltage | Resistor Value | Color Code |
|---|---|---|---|
| Red | 1.9 V | ? | Datei:R-?.jpeg (?-?-?-?-?) |
Column and Plane Connectors


Now add the column and plane connectors to CONN1 to CONN10.
Capacitors
We need four capacitors, two times 100 nF (C1, C2) and two times 22 pF (C3, C4). See the schematic at the left or the table below for their values and positions. Again, all four devices are symmetric and orientation is irrelevant.

| Name | Value | Marking |
|---|---|---|
| C1 | 100 nF | 104 |
| C2 | 100 nF | 104 |
| C3 | 22 pF | 220 |
| C4 | 22 pF | 220 |
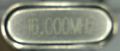
Crystal
Now you should add the 16 MHz crystal U3. You do not have to care about its orientation.
-
16 MHz Crystal

Transistor Array
Now add the transistor array U2. Pay attention to the orientation! There is a marker in the package that can also be seen on the PCB.
Microcontroller socket
Add the microcontroller socket to the PCB at U1. As with the Transistor array, there is a small marker on the package which should be on the same side as the marker on the PCB.
USB Socket
Now add the USB socket. This should be straightforward. You should solder the two big shield connectors on the side, not just plug them in, to increase the stability.
Bootloader Jumper
Now we need the bootloader Jumper CONN12.